I am preparing for a change in my daily schedule now that I will be commuting out of the city for work. I have been stocking the freezer with easy to prepare/reheat meals like soups and pasta sauces using the fresh and seasonal foods at the farmer's markets.
This week I made meatballs. I figure that it will be easy to get a couple out of the bag in the freezer when I get home from work. I can reheat them with some pasta sauce and that will be dinner. The meatballs turned out fabulously. The flavoring was very nice and using a high quality ground beef (organic and free range) was the key to sucess.
To be honest, I have no idea where I got this recipe. I had cut out the recipe some time ago and pasted it in my scrapbook of recipes. I believe it was the New York Times, but I am not sure. Anyhow, they are very good!
Italian Meatballs
Time: 30 minutes
2 lbs of ground beef (or 1 lb ground beef and 1 lb ground veal), let it rest on the countertop for a half an hour before cooking so the meat is not freezing cold
1 cup of bread crumbs
1/2 cup finely grated Parmesan
1 tablespoon chopped, fresh basil
1 tablespoon chopped, fresh parsley
1 teaspoon salt
1/2 teaspoon black pepper
1/8 ground cayenne pepper
2 minced cloves of garlic
2 eggs
3 tablespoons of olive oil
Mix all of the ingredients except the olive oil in a large bowl using your hands. Do not over mix. Take a selection of meat in your hands and roll a two inch ball or meat between your palms. Take care that the meat is firmly packed but not compressed. Repeat until all the meat is rolled into balls. I ended up with 24 meatballs.
In a large, heavy pot (I used my Le Crueset Dutch Oven), heat the olive oil over medium-hit heat. When it shimmers, add the meatballs in batches of eight or so. Do not crowd. Brown well on the bottoms before turning, or the meatballs will fall apart. Turning gently using tongs. Continue cooking until browned all over. Remove meatballs to a plate or paper towel as each batch is finished. No need to add oil between batch as the fat from the prior meatballs adds enough fat cook the subsesquent batches. Let the meatballs cool slightly and then freeze (or refridgerate depending on when you are going to use them) until needed. I also froze some zucchini that I didn't get around to using. It was a super simple process. I found out how to freeze fruits and vegetables using the National Center for Home Food Preservation website. It is a great resource for freezing and canning food, among other things. I am not ready to take up canning, maybe next year, but freezing zucchini couldn't be easier.
Friday, September 7, 2007
Freezer friendly foods

Thursday, August 30, 2007
Food week in review
I have been a delinquent blog poster this week. I found myself with the proposal of gainful employment on Monday and been beside myself with excitement! My dream of working for a food company has finally come true. In preparation of actually starting the job, I have been racing around trying to get a new car, (I will be commuting outside SF) and going for doctor check-ups and such. Plus, the weather has been absolutely gorgeous, at long last, and I have been spending time outside. During my time at home, I have been working away in the kitchen.
On Sunday evening I made a nice dinner of Chicken Breasts with Shallots, Chèvre, Figs, and a Port Reduction Sauce from a recipe on Chow.com. While I quite enjoyed the dish, Mike wasn't too crazy about it. Perhaps it was too French for him? I thought the creaminess of the goat cheese with the sauted shallots and fresh thyme were nice compliments to the chicken. I always love figs. I served this with fresh green beans and roasted fingerling potatoes. I did manage to spill half the reduction sauce all over myself and the kitchen. Good thing there was plenty left for the meal but my god, what a mess!
I should have know that it wasn't a great day for me to be cooking. Earlier on Sunday, I struggled with my new food mill trying to Tomato Sauce from Lidia's Italian Table with some of my own additions, like garlic. It came out all right, once I won my battle with the food mill. After safely stowing the sauce in the freezer, I had to change my clothes. I was completely splattered in red sauce!
While I was simmering the tomato sauce another culinary disaster ensued. I attempted to make L'Affaire du Clafoutis as posted on fellow blogger, Garnett's site Vanilla Garlic and I used a tart pan where the bottom pops out. I should have know better. The mixture of eggs and milk was too thin for that pan and it all came roaring out the bottom of the pan. At that point I was out of sugar. I have been trying to find a suitable organic sugar to use for my baking sugar. I went to Mollie Stones and did some shopping. I came back to try my clafoutis again in a different pan. In moment of overconfidence, thinking I had memorized the simple recipe, I forgot the "pinch of salt." Well, the missing salt and use of fat free milk, not whole milk or cream, resulted in a flat and bland tasting clafoutis. A bummer because the Italian prunes sure were delicious!
On Tuesday night I went camping with my girlfriends near Stinson Beach under the full moon. We made s'mores over the campfire for dessert. Those sweet graham cracker sandwiches brought back memories of my childhood. We had big bonfires and cookouts in our backyard with all of our neighbors each summer. My dad would whittle the kids roasting sticks for the marshmellows. I would burn at least 10 marshmellows before I toasted one perfectly and could assemble my s'more.
On Wednesdy afternoon I made a batch of absolutely delicious Pear Ginger Muffins from blog, Coconut & Lime. They are sensational. Initially, I thought the ginger might be overwhelming but it was a perfect compliment to the sweet pear. I froze half and we have been snacking on the other half of the batch. I envision eating these muffins on my way to work this fall.
Today has found me in the kitchen again. I made a batch of Split Pea and Ham Soup from a Moosewood cookbook. Obviously, I added the ham to the recipe. It is the best split pea soup and it very easy to make. The secret ingredient is red wine vinegar which you add at the end of cooking. The acidity brings out the flavors nicely. It went to the freezer as well for the winter when we are both commuting.
As I type this post, I am slow roasting tomatoes using Kalyn's Kitchen's recipe. My herb combination was fresh basil, fresh rosemary, and dried oregano. I also used some fresh ground black pepper. They are coming along nicely and the house smells divine.
This week, I finally purchased Jamie's Italy which I had been coventing. It was a great purchase. I have also been reading the book, Alice Waters and Chez Paniesse: The Romantic, Impractical, Often Eccentric, Ultimately Brilliant Making of a Food Revolution. It is very well written and I can barely put it down, but don't want it end either. I highly recommend putting it on your "must read" list.
I must run. Mike is taking me out to dinner to celebrate my new, cool job. We are headed to a great place in the neighborhood, Firefly. Then tomorrow I jet off to Miami, FL to spend the weekend with my Cornell girlfriends. Art deco, cuban food, and the beach, here I come! I just love, L-O-V-E Miami! And Rachel too. She is the one we are celebrating this weekend.
Monday, August 27, 2007
Summer risotto of corn, wild mushrooms, and spinach
Having picked up some shiitake mushrooms at the Farmer's Market last week, I set about finding a seasonal recipe in which to use them. After searching for a while, I came across a recipe on Epicurious.com for Roasted Corn, Wild Mushroom, and Spinach Risotto. We love risotto and Mike adores fresh corn. I was also sold on the fact that it was a hometown recipe. It is from Boulevard, a very upscale restaurant in San Francisco. It was more work than I anticipated, but it turned out marvelously!
Roasted Corn, Wild Mushroom, and Spinach Risotto
adapted from Epicurious, Bon Appetit, Boulevard, September 1997
Serves 5-6, in my opinion, the recipe said 4
4 ears of fresh corn that has been husked
4 tbsp olive oil
2 cups of wild mushrooms thinly sliced (I used shiitake and oyster mushrooms)
2 tbsp, fresh thyme, chopped
6 cups of chicken stock
1 1/4 cups chopped onion
1 1/2 cups of arborio rice
1/4 cup dry white wine
2 cups of baby spinach, stems removed
2 tbsp grated Parmesan cheese
1 tbsp butter
2 tbsp chopped chives or green onions
Preheat the oven to 400 degrees. Place the husked corn on a baking sheet. Brush or rub the ears with olive oil. Roast the corn in the oven until tender and brown in spots. Turn the ears occasionally and roast for about 40 minutes. Remove the corn from the oven and let cool to the touch. Cut the corn kernels off the cobs. Reserve 1 cup of the corn kernels. Combine the remaining corn and 1/2 cup of chicken stock in a food processor or blender. Blend until almost smooth. Set puree aside for later use. This entire step can be done in advance and refrigerated. Toss the sliced mushrooms with the chopped thyme and 1 tbsp of olive oil on a large baking sheet. Sprinkle with salt and pepper. Roast mushrooms until tender and they are beginning to turn golden, stirring once. This will take about 15 minutes.
Bring 5 1/2 cups of chicken stock to a simmer in a large pot. Reduce heat to low and keep the stock hot.
Meanwhile, prep the remaining ingredients. Then heat 2 tablespoons olive oil in a large saucepan over medium heat. Add the onion and saute for 2-3 minutes. Add rice; stir for 3 more minutes. Add wine, stir until liquid is absorbed. This will take 1-2 minutes. Add 1 cup of the stock. Simmer and stir until the liquid is absorbed. Add a 1/2 cup of the stock at a time thereafter. Simmer until stock is absorbed before each 1/2 cup addition of the stock. Stir mixture frequently. You are looking for tender rice that is still slightly firm in the center and the mixture looks creamy. Taste rice grains as you go. 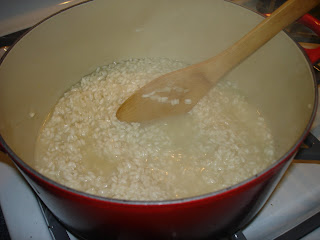 Mix corn puree, reserved corn kernels, half the mushrooms, spinach, Parmesan cheese, and butter into the risotto. Stir in the last 1/2 cup of chicken stock to moisten, if necessary. Season with salt and pepper. Remove from heat. Serve risotto in soup bowls and topped with remaining mushrooms and a sprinkling of chives or green onions.
Tuesday, August 21, 2007
Mediterranean Chickpea Salad
After surveying our fridge for fresh vegetables, I threw together a quick salad to go with our turkey burgers. Here is what I put together in about five minutes. It turned out to be a great side dish.
Mediterranean Chickpea Salad
1 can chickpeas, rinsed
1/4 cup capers, drained
1 cucumber, diced into 1/2" pieces
1 tomato, diced into 1/2" pieces
1 can/jar of quartered artichoke hearts, drained
1 lemon, juiced
Olive oil
Salt
Pepper
Combine chickpeas, capers, cucumber, tomato, and artichoke in a bowl. Juice one lemon over the mixture and be sure to avoid getting any lemon seeds into the salad. Pour the olive oil over the mixture. Crank the pepper grinder a couple times and add about a teaspoon of salt to start. Capers are salty so you might not need much additional salt. Stir everything together. Taste and adjust seasonings as required. Serve at room tempurature.
Put any leftovers in the fridge and have them the next day for lunch. I added some diced salami and smoked turkey to the salad for some extra protein. Tasted great the next day too!
Thursday, August 16, 2007
Batch 3: Vanilla Frozen Yogurt
Pinkberry does not have anything over this vanilla frozen yogurt. This stuff is heavenly. It tastes so refreshing and is not so bad for you that you cannot have a little bit every evening. Or if I were living through some of the heat that the rest of the US is experiencing, I would probably eat this for a meal topped with lots of fresh fruit and nuts.
Here is a picture, albeit a poor one, of the frozen yogurt. I am too impatient to take a picture before I start scooping this stuff directly into my mouth. And yes, that is a half of a donut. 
Whisk together the yogurt, sugar, and vanilla until well-blended and the sugar is dissolved. Refrigerate for an hour or so. Freeze the mixture in your ice cream maker according to the machine's instructions. I have found that it takes a little longer to churn frozen yogurt than ice cream.
This recipe is so easy and disappears so quickly, you'll be making batch after batch to keep up with the demand.
Sunday, August 12, 2007
Heirloom tomatoes

- Tomatoes are native to the Americas and the Aztecs and Incas were cultivating them as early as 700 A.D.
- The original Aztec word for "tomato" was "tomatl."
- Tomatoes were the first genetically engineered food approved by the US FDA. It was all downhill from there!
- Hothouse tomatoes represent nearly one-fourth of the retail tomato market in the U.S.
- You better get your heirloom tomatoes while you can! The season lasts from July to October.
Here is a quick and easy salad that brings out the beautiful flavors of these fresh and natural tomatoes.
Heirloom Tomato Salad
3 lbs of heirloom tomatoes, cut into wedges or 1/2 inch dice
1 tbsp red wine vinegar
1/2 tbsp sherry vinegar
1/2 tbsp Djion mustard
1 tsp salt
1 tsp pepper
1/4 cup olive oil
In a small bowl, whisk together the vinegars, mustard, salt, and pepper. Slowly stream and whisk in the olive oil until emlusified. Place your cut tomatoes in a large bowl and toss with the dressing and serve immediately.
Saturday, August 11, 2007
Friday night is pizza night!

Wednesday, August 8, 2007
Batch 2: Strawberry-Sour Cream Ice Cream
I was more adventuresome with my second batch of ice cream, pairing strawberries with sour cream for a sweet and tangy combination. I used perfectly ripe, organic strawberries from the farmer's market. This recipe was a Philadephia-style ice cream which does not require using eggs or making a custard. So much easier than the French Vanilla recipe I tried initially! The recipe I used was from The Perfect Scoop, by David Lebowitz. However, I adapted his recipe slightly, using more heavy cream (1 1/4 cups) and slightly less sour cream (3/4 cups). For no reason other than I only had 3/4 cup of sour cream on hand. This time, I let the machine run longer so that the ice cream was even more churned than last time. Using the freshest, most natural ingredients makes all the difference in the quality of the ice cream.
Next up: Vanilla Frozen Yogurt (inspired by Pinkberry) and Kiwi Sorbet
Friday, July 27, 2007
What to do with leftover rice
I hate to waste anything. It kills me to throw out leftovers. I am always trying to figure out how to use up ingredients and leftovers creatively. I can't seem to make decent rice for just two people so we always have lots of rice leftover, often enough for several meals. After some brainstorming I decided to make these simple and delicious rice cakes. They are a take on the mashed potato patties that my mom used to make with left over mashies. The rice cakes a little healthier for you.
Rice Cakes
2 cups of leftover rice
2 eggs
1/2 cup bread crumbs
1 tbsp milk
salt
pepper
1 tbsp olive oil
Whisk two eggs in a medium-sized bowl. Add the rice, bread crumbs, milk, and salt and pepper to taste. Using your hands mix ingredients together until well blended and the mixture starts to stick together. Scoop up a small ball of the rice mixture and form a patty about 2 1/2 inches wide by 1/2 inch tall. You should get about 5-6 rice cakes out of this recipe. Heat olive oil in a large skillet until hot. Add rice cakes and let cook for about 3 minutes on each side. Plate and serve.
The great thing about this recipe is that you can season the rice anyway you want. You can also add leftover, diced, cooked veggies to the rice mixture. Be creative!
Friday, July 20, 2007
Batch 1: French Vanilla Ice Cream

Monday, July 16, 2007
A bolognese to warm your soul
This past Friday night I served up the bolognese sauce that I had made earlier in the week while Mike was out-of-town on a business trip. This hearty sauce served on top of perfectly cooked mini penne was delicious. Perfect for a chilly San Francisco summer evening. (Where is the sun? Enough of this oppressive fog!) We had a bottle Chianti with our meal and the wine enhanced the flavors of the tomato-based sauce.
I am just crazy for Italian food. The more authentic, the better. So when I received a recipe for bolognese at my bridal shower from an old friend who has spent a lot of time in Italy, I was absolutely thrilled.
The typical bolognese sauce is a thick, full-bodied meat sauce that contains ground beef (and sometimes pork), pancetta, tomatoes, onion, celery, carrots, garlic, and can be enhanced with wine, milk or cream and seasonings.
Here is the special recipe that was shared with me.
Ragu alla Bolognese
Serves 8-10
Cooking time is minimum of 2 1/2 hours
(A special thanks to Judy Alexander for sharing the wonderful recipe with me!)
1 lb ground beef (I like the lean 90/10 kind and buy the best quality.)
1/3 lb prosciutto
1 whole onion, finely diced
2 medium carrots, finely diced
2 stalks celery with leaves, finely diced
1 small can of tomato paste
1, 8oz can beef broth
2, 8oz (or 1, 16oz) can of crushed tomatoes
1 /4 cup shredded Parmesan cheese, optional
1/2 tbsp dried oregano
2 tbsp fresh, chopped basil
Salt
Pepper
In an 8 quart stockpot, crumble the ground beef and brown it over medium heat. When it is nearly brown add the chopped prosciutto. Cook until all the meat is browned. Add diced onion, celery, and carrots. Pepper to taste. When the onion is clear, add the tomato paste and beef broth. Reduce heat to medium. Mix until the paste and broth are well-combined in the pot. Allow broth mixture to heat for 2-3 in minutes. Add the crushed tomatoes and oregano and mix until combined. Here is where you can add the Parmesan cheese for a little something special. Turn the stove burner to very low heat and allow the sauce to simmer for at least two hours. A sign that it is cooking well - a layer of bright red oil will rise to the surface. Stir occasionally. After approximately two hours, the sauce should be ready. However, it was advised that the longer the sauce simmers, the better it will taste. I let mine simmer about three hours and took the lid of the pot on and off to keep it from losing too much moisture. Five to ten minutes before serving, add basil. Then, salt to taste. Serve with tagliatelle, penne, or any other pasta with a lot of surface area.
This sauce also freezes and reheats well. Be sure to add the basil and salt when you reheat for optimal flavor.
For dessert I made this lovely Almond Cake. It is a recipe by Giada Laurentis (I love her!) and it was delightful. Light and sweet with a nice texture from the corn meal. In addition to garnishing with powdered sugar, I added some toasted, sliced almonds. In a perfect world, I would have served it with olive oil ice cream. 
Monday, July 9, 2007
Upscale gallo pinto
Dinner came together very well and very quickly. We doubled the number of dinner guests at the last minute so I sent Mike to the local butcher for some chicken breasts on which I put a chili powder dry rub on and he grilled to perfection. I also sliced and grilled zucchini and garnished them with queso fresco.

Sunday, July 8, 2007
I am home!
Check back on my blog frequently as I am now officially on the "pro-leisure circuit" for the summer as I look for a new job. I will cooking up a storm, reading lots of food books, and plan to try and test lots of new kitchen gear and products.

Wednesday, June 6, 2007
Sweet strawberries
It is strawberry season here in California and I have died and gone to heaven. I absolutely love in-season strawberries. You know, the kind that are red the whole way through. They are tender, juicy, and have barely any white flesh. They melt in your mouth. Any they definitely do not need any additional sugar. They are sweet enough on their own.
Strawberries remind me of the summers' of my youth when school had just let out and softball season was nearly over. My brother and I used to beg my mom to buy strawberries at the local farmer's market and somehow, on the car ride now, half the quart would disappear. With the rest of the berries, I would beg my mom to make strawberry shortcakes. If the weather wasn't unbearably hot, she would turn on the oven and make shortcakes for dessert. She used a simple Bisquick recipe to make the shortcakes. Somehow my mom would pull them right out of the oven just in time for dessert. Then she would send me to the kitchen to prepare the dishes.
When assembling shortcakes, I use a fork to gently split open the cakes in halves. Then I scoop vanilla ice cream or vanilla yogurt onto the bottom half, stack the top half on the ice cream (or yogurt) and place a generous portion of sliced strawberries on top of it all. It is best to serve this dish in a bowl. The warm shortcakes contrasted with the cold ice cream make for a wonderful taste sensation.
I leave tomorrow for my trip and when I return it will no longer be strawberry season. I figured it was my last chance for my annual strawberry shortcake indulgence. So I whipped up some dessert for our dinner this evening. It was divine! I had to scour the internet for the Bisquick recipe that my mom used. Sadly, it is not longer on their box. I then altered the recipe a bit for my liking, which is below:
Strawberry Shortcakes2 1/3 cups Bisquick mix
1/2 cup milk
1/2 tsp of vanilla
3 tbsp sugar
3 tbsp melted butter
Sliced strawberries
Vanilla yogurt or ice cream
1. Preheat over to 425 degrees
2. Stir Bisquick mix, milk, sugar and butter until a soft dough forms. Drop six, equal spoonfuls of the dough onto an ungreased cookie sheet.
3. Bake 10-12 minutes or until golden brown. Spilt warm shortcakes; fill the center with ice cream or yogurt, replace top and generous top the shortcakes with the sliced strawberries. This time of year there is no need to sweeten the berries.
For all you East Coasters, strawberry season has just kicked in and you can enjoy strawberries with or without shortcake all month!
Monday, May 28, 2007
Cooking up a storm
 This has been quite a weekend for cooking. Yesterday I made brunch for friends. As you can see from Hunter's comment on my previous post that the menu went over well. I even managed not to burn the frittata, though it did get a little dark. The food was quick and simple to make and I bought all ingredients that morning at the local produce bodega. For once, my timing for cooking was great and I got to spend plenty of time with our guests. Here is a peak at the grilled pineapple dish. Very yummy!
 Then I made peanut butter cookies from the P.B. Loco White Chocolate Raspberry Peanut Butter that arrived earlier this week. They turned out very well, with just a hint of the white chocolate raspberry lingering on the palate. They have certainly been a big hit with Mike. He is not allowed to eat them all. The cookies are for a BBQ next weekend so I put most of them in the freezer.
Thursday, May 24, 2007
A quick and easy brunch menu
This Sunday we are having some dear friends over for brunch. I have been thinking about what to make ever since we invited them to come over. A little neurotic, I know, but I love planning menus! We are planning a day trip on Saturday so that does not leave a lot of time for prep and I will likely do the shopping on Saturday night or Sunday morning. So I can't go overboard and that pretty much rules out any baked goods. I have been dying to make a frittata now that I have the right pans. (The last one I made was a disaster - I burnt the top to a crisp.) We brought some macadamia nuts with us from Hawaii and I have been searching for fun recipes that call for them. Those two factors were my inspiration for this simple brunch menu:
Frittata with asparagus, tomatoes and fontina
Grilled pineapple with Nutella and macadamia nuts
Artisanal bread, toasted, with jams and butter
I think I can whip this up in no time and can focus on spending time with our friends and not in the kitchen.
Friday, May 18, 2007
I never buy salad dressing
That is because I nearly always make it myself. This Mustard Vinaigrette is the simplest recipe and you can scale depending on the number of people to which you are serving salad. The mustard gives the vinaigrette a nice bite but isn't overwhelming and the olive oil is super healthy. And most importantly it tastes SO GOOD!
Mustard Vinaigrette
Ingredients:
1 part real deal Dijon mustard, I recommend the brand Maille which can be found any grocery
store
1 part vinegar, typically I use red wine vinegar or champagne vinegar
3 parts extra virgin olive oil
Salt and pepper to taste (I recently discovered course salt adds a nice crunch)
Your "parts" can be 1 tsp mustard, 1 tsp vinegar, and 1 tbsp olive oil which would serve about one person. For a larger amount use 1/3 cup mustard, 1/3 cup vinegar, and 1 cup olive oil.
Directions:
Whisk the mustard, vinegar, salt, and pepper together. Then slowly drizzle the oil into the mustard and vinegar while whisking constantly to incorporate. Pour mixture over the salad, toss, and serve. Enjoy! And please try all sorts of varieties including adding herbs, using different vinegars, using different types of mustard, to give you some ideas.
Sunday, May 13, 2007
Date night

Perhaps the most delicious part of the recipe is the prosciutto chips. You take slices of prosciutto and put them flat on a cookie tray. I used a silpat on the cookie tray to make cleaning easy. You put the slices of prosciutto in a preheated oven at 450 degrees for 6-8 minutes or until crispy. Then remove the tray from the oven, take the prosciutto slices off the tray and place them on paper towels. Once cool, crumble the crisped prosciutto into bite-sized pieces. In the case of this recipe, you garnish the risotto with the crispy prosciutto, but you could put it in salad, on pizza, etc.
Check out the very delicious recipe for Champagne Risotto. I promise it is as good as the picture looks!
Friday, May 11, 2007
Roasting and boasting
Earlier this week I tried roasting a chicken for the first time. I now own a roaster which is very exciting. This is the first large piece of meat I have ever prepared. I mean, really, who has time to roast meat? It takes way too long. Definitely a weekend evening activity.
My roasted chicken turned out pretty well for a first timer. I had to consult several sources to figure out how exactly to roast a chicken so I will share the process with you.
Buy a whole chicken - kosher, organic, whatever. For me the kind of chicken wasn't that important the first time. I bought a 3.5 pounder, free range chicken from the local butcher, Drewes Bros Meats. I would probably buy a bigger bird next time though so I would get more meat. Rinse the chicken and pat dry. If you are like me, you'll pray that there aren't any innards in the cavity that you have to remove.
I sliced a lemon in half, peeled 3-4 cloves of garlic, and selected a few sprigs of rosemary and placed them in the cavity of the bird. Next I tied the legs together with kitchen string. I rubbed the whole bird with olive oil (you can also use butter) to make the skin nice and crispy.
I placed the bird on the v-rack in the roasting pan and placed the whole ensemble in the oven on the middle rack. Set the oven to 400 degrees and cook for 15 minutes. Then turn the oven down to 350 degrees and cook for an 1 1/2 hours (for a 3.5 lb bird) or 2 1/2 (for a 5 lb bird). Also, check (compulsively the first time) the status of cooking by sticking a meat thermometer deep into the thigh of the chicken and when the internal temperature is 170 degrees and the jucies run clear, that mad hen is ready to come out of the oven.
Like I have seen my mom do with turkey, I let the chicken rest on a cutting board for 5-10 minutes before cutting into the bird and serving.
Mike likes the white meat and I like the dark. We both thought the chicken was very flavorful and tender. Mike even said it was better than Boston Market and he holds Boston Market in high regard. I served roasted, rosemary new potatoes and fresh English peas with the chicken.
Next time I will try cooking a slightly a larger bird and maybe stuff the cavity with some other herbs.
Thursday, May 3, 2007
French martinis
French martinis are my absolute favorite cocktail. They are the perfect stiff drink masked by just the right amount of sweetness. I have got lots of my friends hooked on them. If you want to make them at home here is the recipe that I use:
2 oz Vodka
½ oz Chambord (it comes in an orb-shaped bottle)
2 ½ oz Pineapple Juice
Pack a shaker full of ice and add all ingredients. Shake or stir. I usually shake to get a nice muddled color. Strain into a martini glass. Garnish with a lemon twist (optional, I never do it).
Enjoy! I sure do.

